How to create a Test plan, Test suite, Test cases, and Run the Test Cases in DevOps
1. How to Create a Test Plan
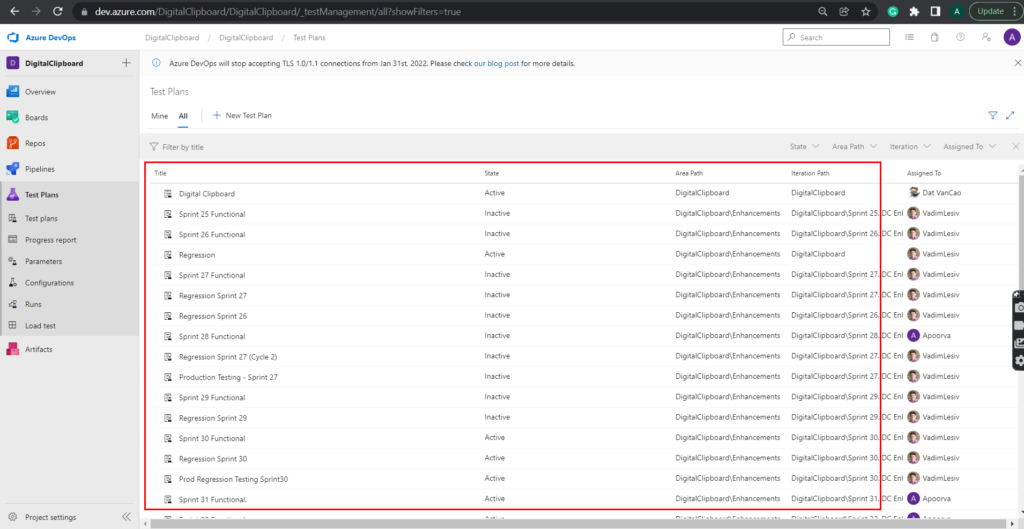
- From the web portal, open your project and go to Test Plans. You will see all the Test Plans of your project.
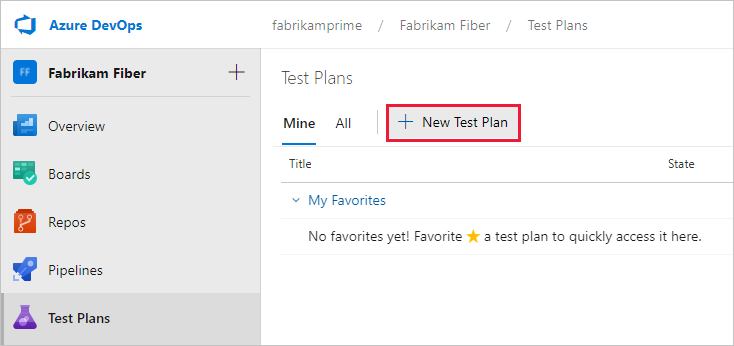
2. On the Test Plans screen, select New Test Plan to create a test plan for your current sprint.
3. In New Test Plan, enter a name for the test plan. Verify the area path and iteration are set correctly, then click on the Create button.
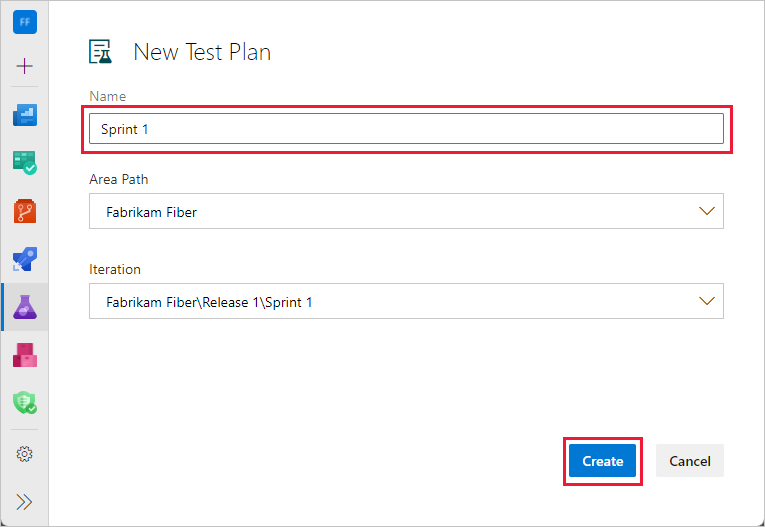
A test Plan will get created.
2.How to create Test Suite:
There are 3 types of Test Suites. To write the test cases we need to create a test suite first.
a. Static Suite – This type of suite doesn’t belong to any item from the DevOps, it is just a folder in which we can add the test cases.
1. Go to Test Plan.
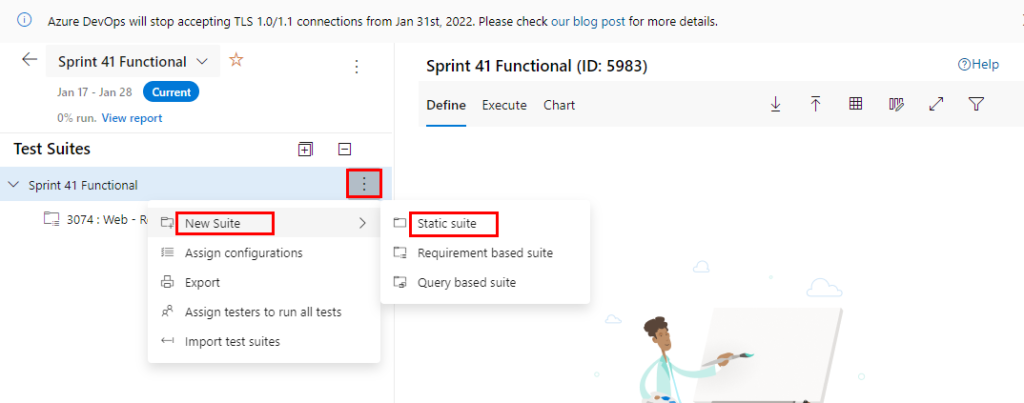
2. Click on the 3 dots in front of the test plan name and then select New Suite > Static suite.
3. Give the name to the Static Suite and create the test cases by clicking on “New test case” button.

b. Requirement Based Suite – This type of suite is associated with the items from the projects in DevOps. You have to select the ticket for which you need to create the test cases.
1. Go to Test Plan.
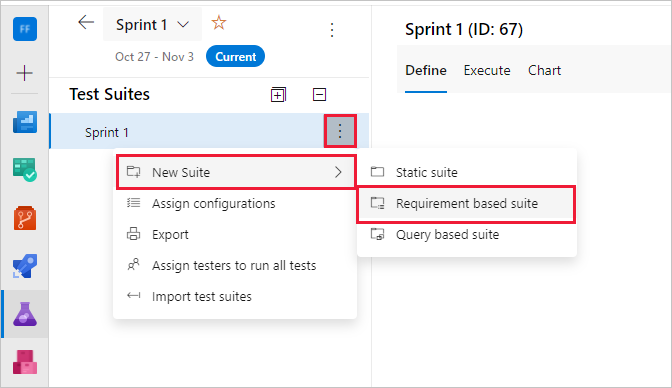
2. Click on the 3 dots in front of the test plan name and then select New Suite > Requirement based suite.
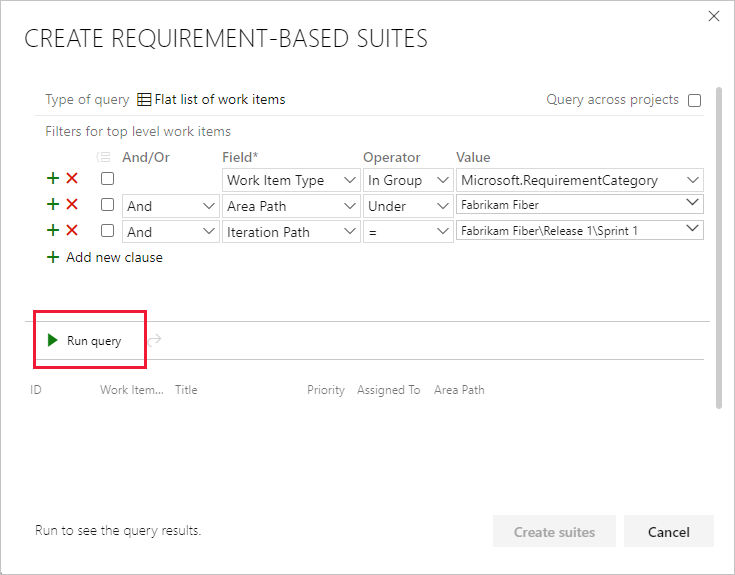
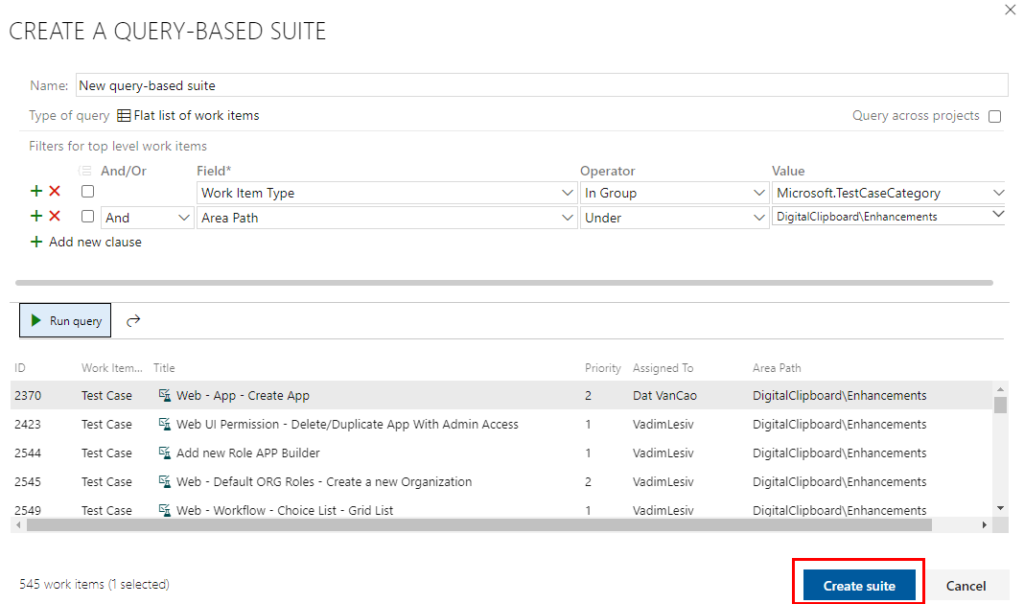
3. In Create requirement-based suites pop up, add filters to find the backlog items for which you have to create the test cases and click on the “Run query” button to view the matching items.
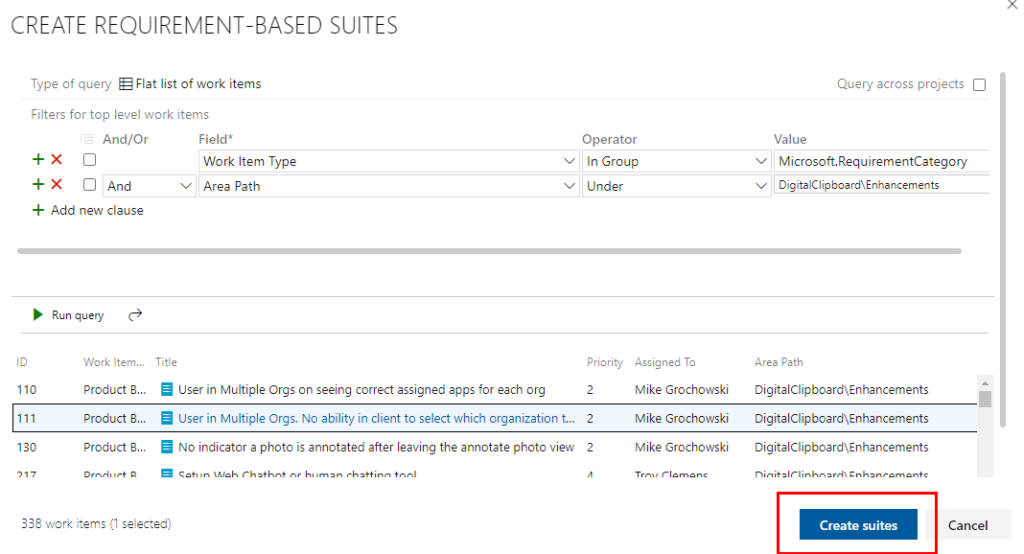
4. In the list of work items returned by the query, select the backlog items for which you want to create the test cases and click on the “Create Suites” button.
The Requirement bases test suite will get created. Now add the test cases into it.
c. Query Based Suite
1. Go to Test Plan.
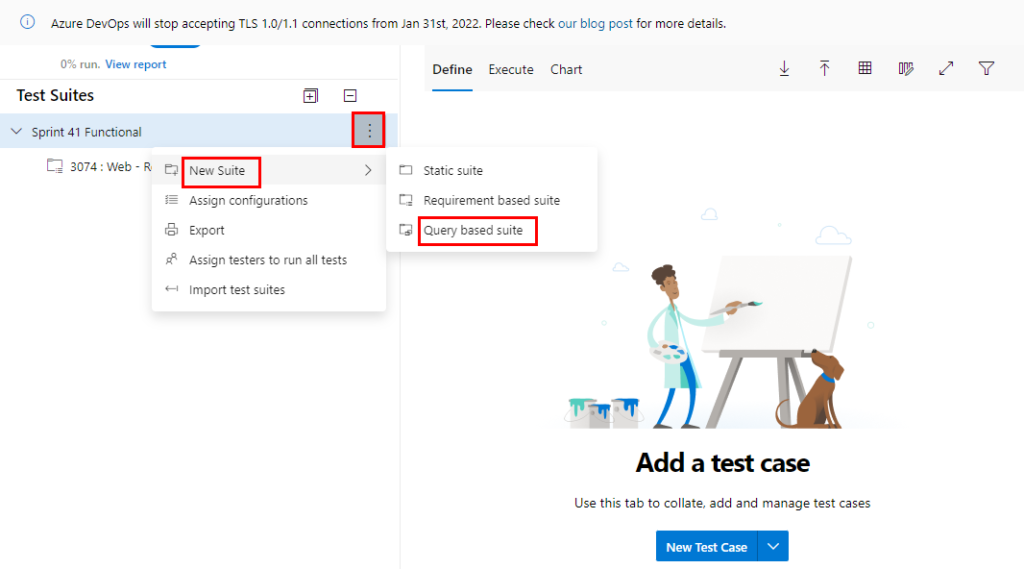
2. Click on the 3 dots in front of the test plan name and then select New Suite > Query Based Suite.
3. In the list of work items returned by the query, select the backlog items for which you want to create the test cases and click on the “Create Suites” button.
The Query Based Suite will get created. Now add the test cases into it.
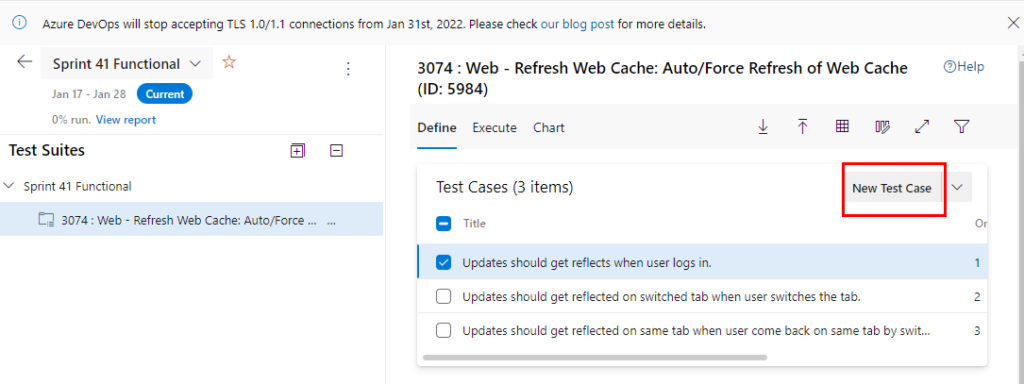
3. How to Add Test Cases in test suite:
- Select a suite in which you want to add the test cases. To the right, click on the New Test Case button.
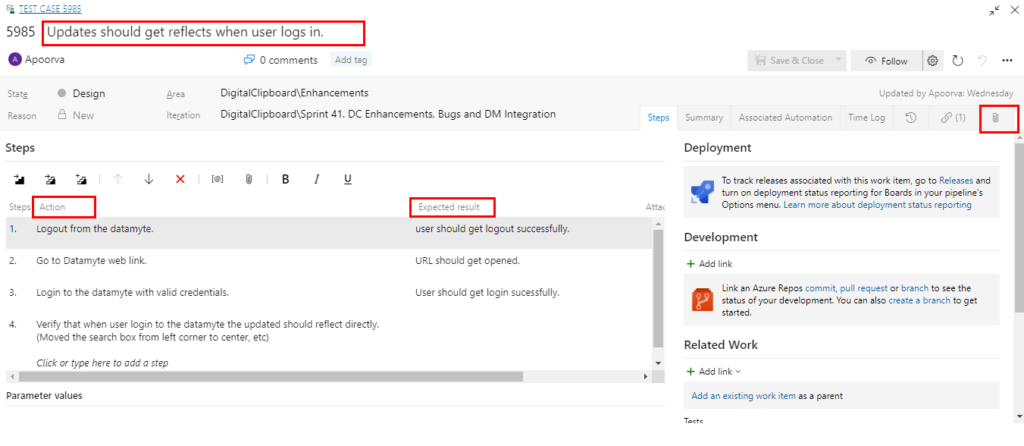
2. Write the Test Case Title, Action Steps, and Expected Result. You can also attach the apk file or images by clicking on the Pin icon.
3. To add steps, click on the “Click or type here to add a step” option.
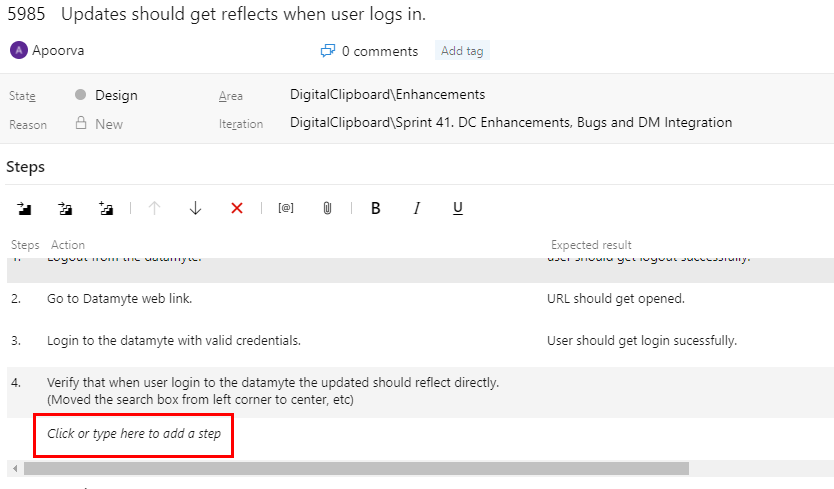
4. Click on the “Save and Close” button after writing all the steps.
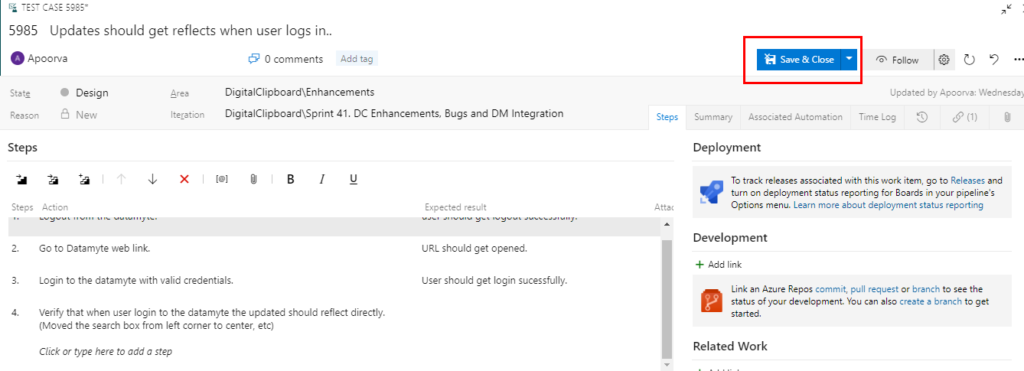
5. Your test case will get added to the test suite.
4. How to Run the Test Cases:
Follow the below steps to Run Test Cases:
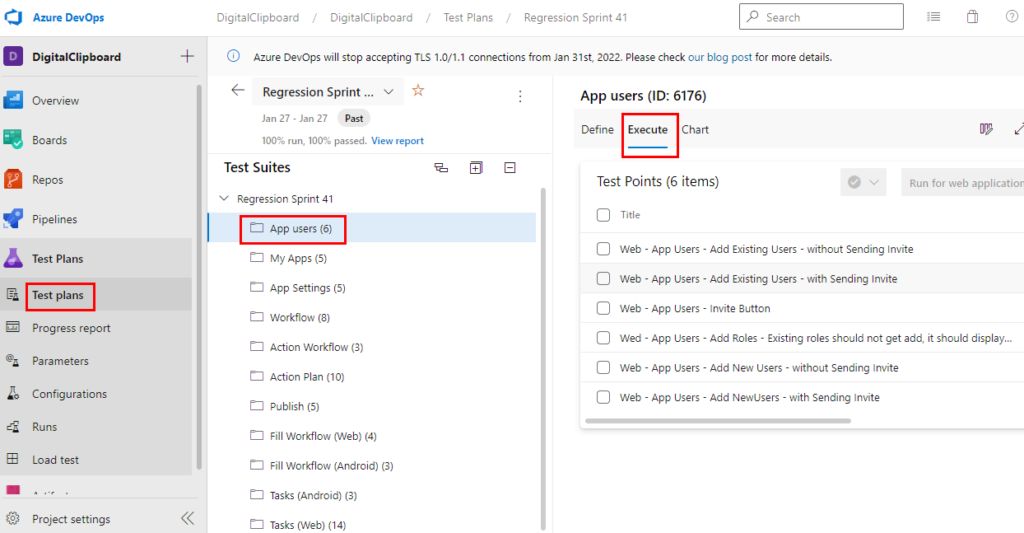
1. From the web portal, open your project and select Test Plans > Select a particular test plan.
2. Select the test suit of which you want to Execute the Test cases.
3. Select the Execute tab.
4. Click on the three dots icon of a particular test case.
5. Click on Run, and select Run for a web application if you are running on the web application.

Microsoft Test Runner opens and runs in a new browser.
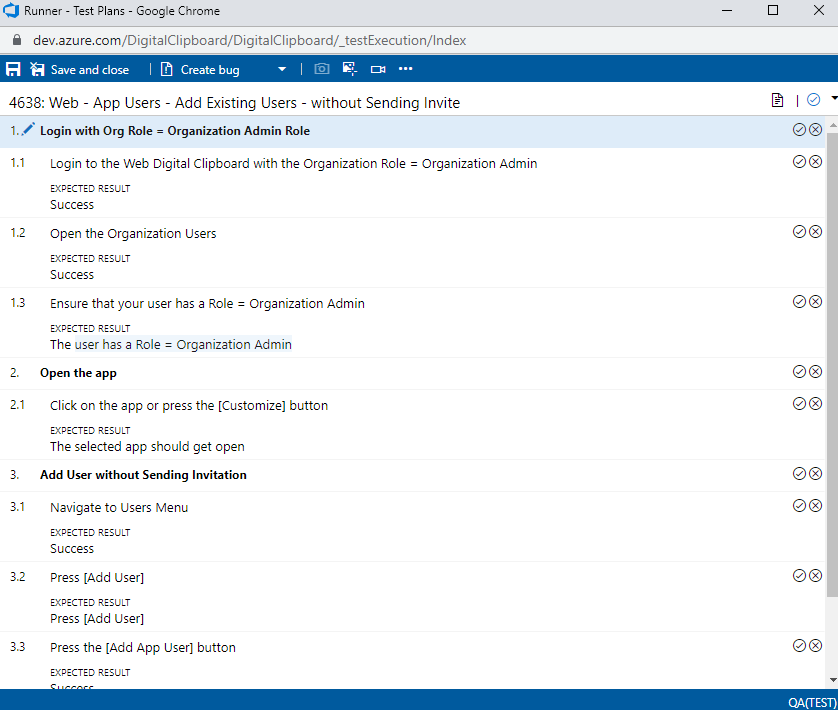
6. Start the app that you want to test. Verify the test cases which is mentioned in Microsoft Test Runner in your web or mobile app.
Follow the below steps to Mark the outcome/result of the test cases:
- Click on three dots icon of test Case which you have run before.
- Click on Mark outcome, and select test case status as per the outcome.

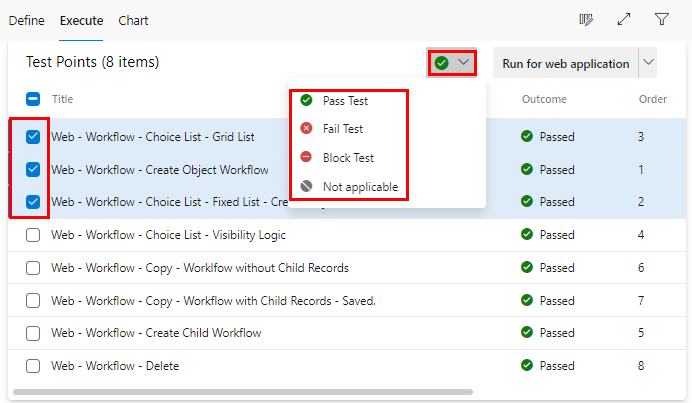
Follow the below steps to mark multiple result of the test cases:
1. Select checkboxes of test cases of which you want to mark the outcome.
2. Click on the outcome dropdown.
3. Select the outcome.

0 Comments