Process to be followed in the Jira Sprint
- Login to Jira using this link https://axonator-engineering.atlassian.net/jira/projects
- Enter your own login credentials and visit the current Sprint.
- Check if any task or bug assigned to you daily.
- Testers should log the issue or review the sprint daily to check its status.
- Change the state (In progress/Ready to deploy/In testing/Done) of the ticket if you are working on that ticket.
- Add the Code completion date to the ticket without fail.
- Testers should mark the ticket as done once its all bugs are fixed.
- Log the time in the same ticket on which you have worked on, once you are done working on it daily.
You can check the above points in detail below –
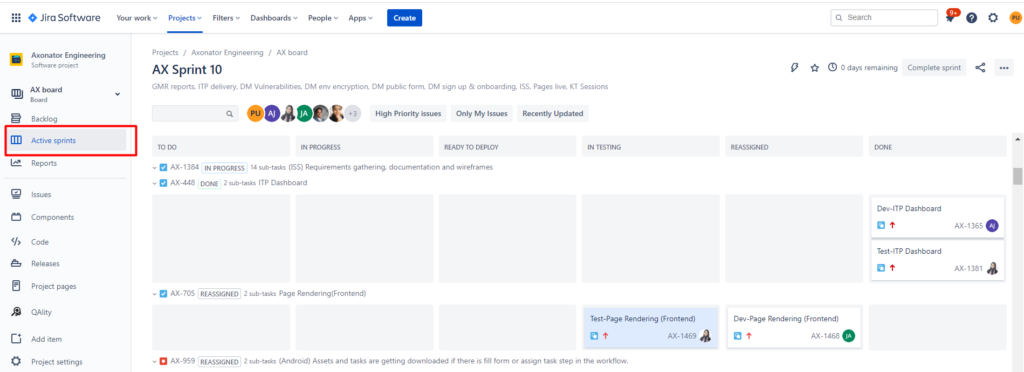
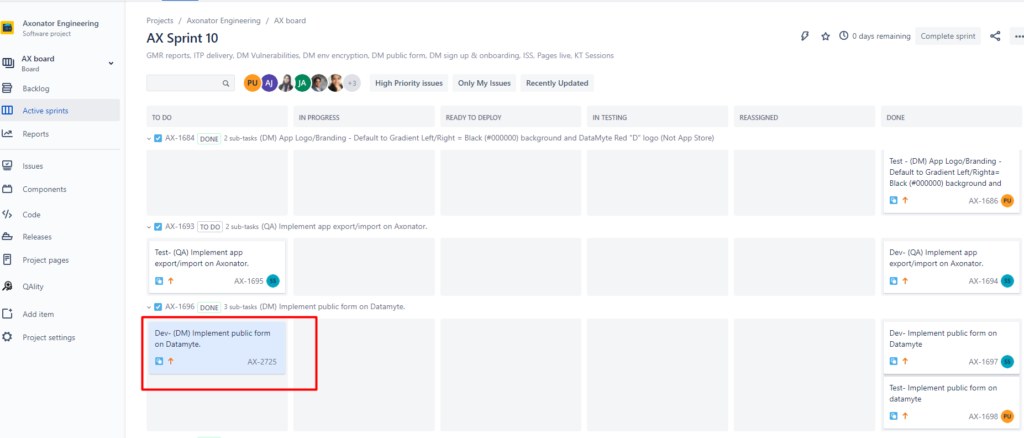
1. How to check the Sprint?
- Click on the project.
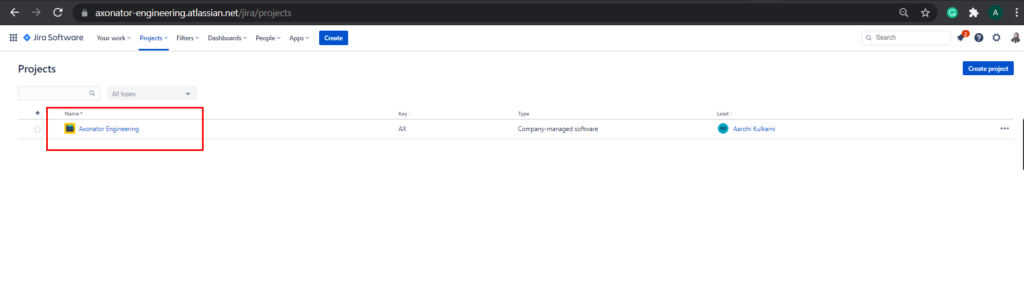
- Click on the Active sprint tab from the left menu.
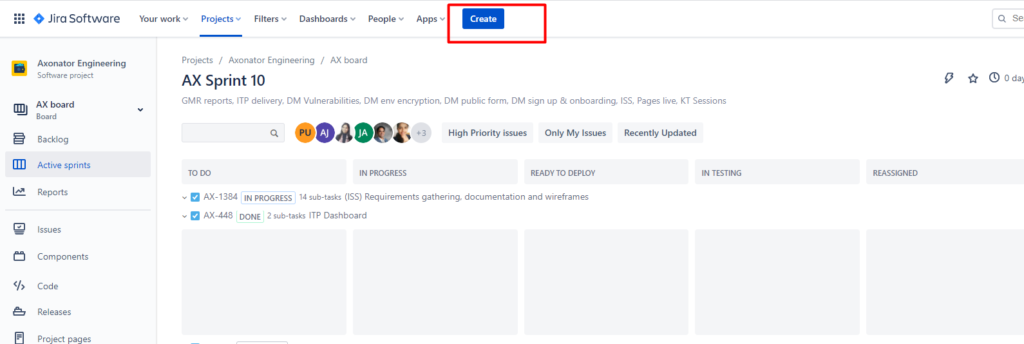
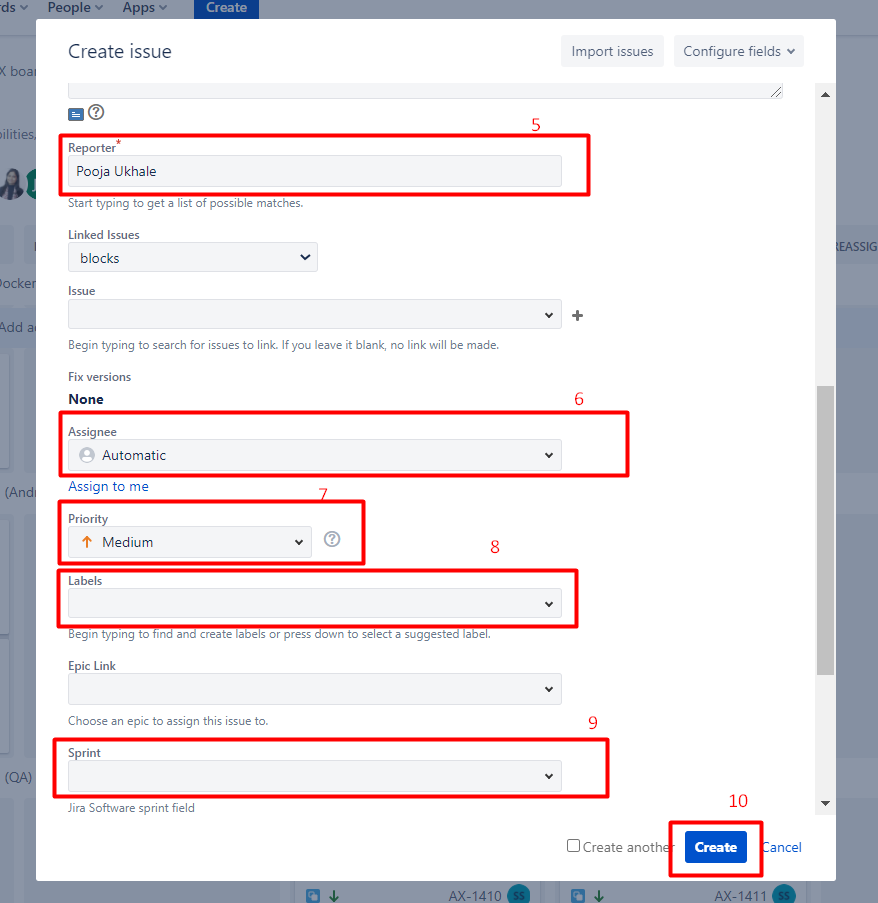
2. How to create a Task/ Bug?
- Click on Create button
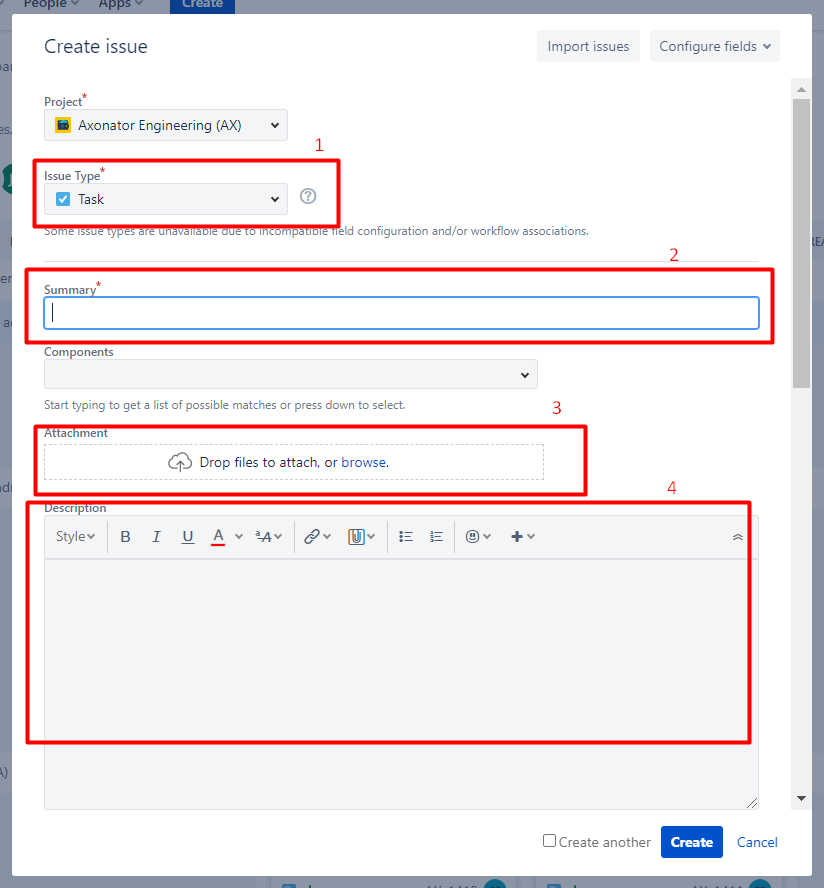
- Add the required details as below-
- Click on the Issue Type dropdown to select the type of the ticket you are creating. For example-Task/ Bug.
- Add the summary for the Task/ Bug in the summary field
- Add the attachments and screenshots in attachment field
- Add the description for the Task/ Bug in description field like repo steps for the bug or the required details of the task.
- Select the reporter if you want to change it, the member who is creating the task/ Bug form the list in reporter field.
- Select the assignee form the list in assigner field, to whom the task/ Bug is to be assigned. Change the assignee to QA member when you are changing the state of the ticket to “In testing”.
- Select the responsible person from the list in responsible person field who will be responsible for that ticket.
- Select the priority from the list in Priority field, to set the priority to the ticket.
- Select the label from the list in Label field, to specify the type of issue/task.
- Select the sprint in which the task/ bug need to be added from the list in the sprint field
- Click on create button
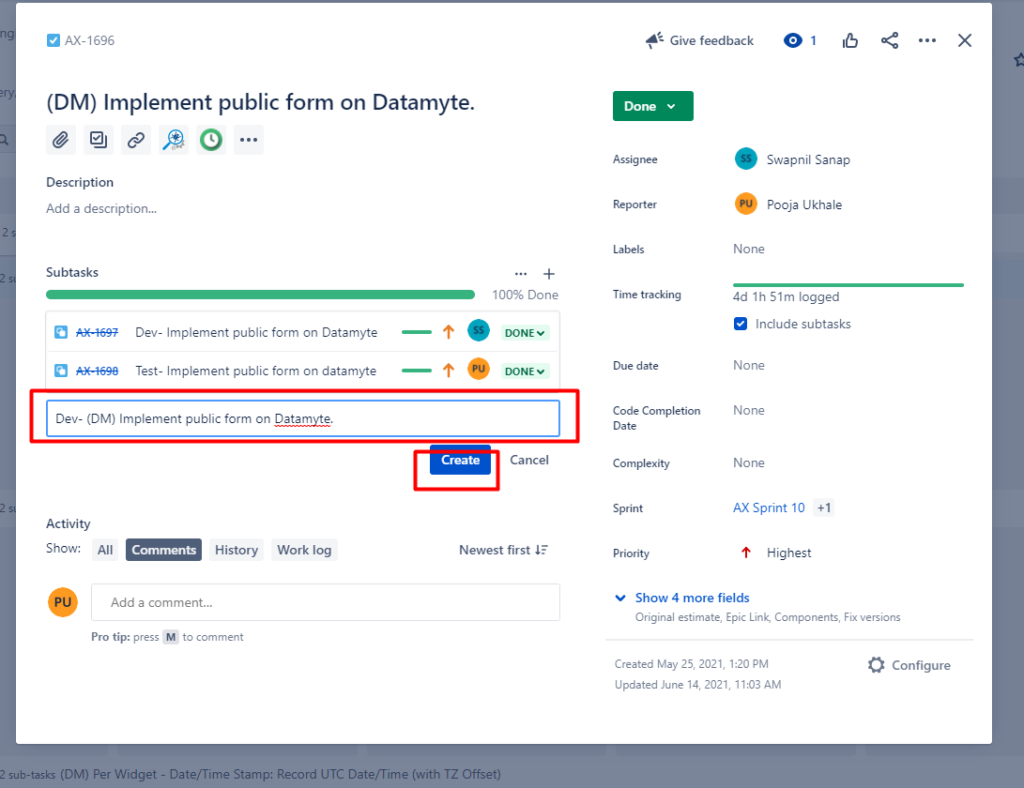
3. How to create a Subtask?
After creating any Task, you can create a subtask that is related to that ticket.
Below steps for subtask creation for a Task-
- Open the main task.
- Click on create subtask icon
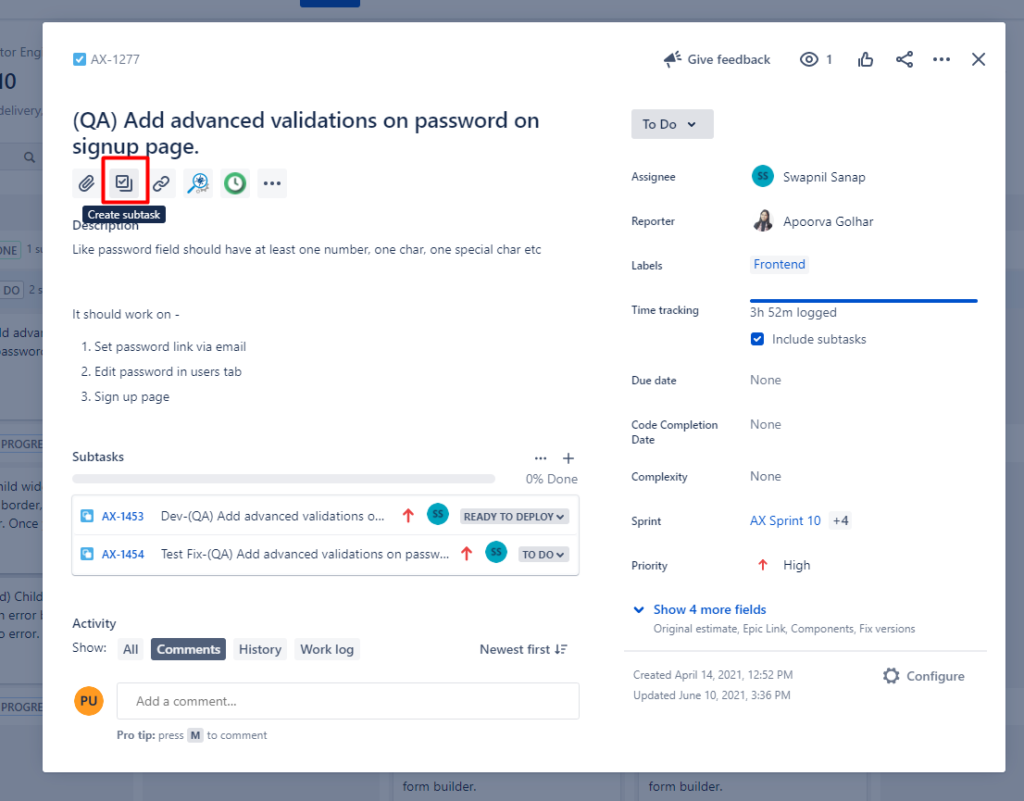
3. Enter the details below –
- Add the title.
- Click on Create button.
4. Click on the created subtask
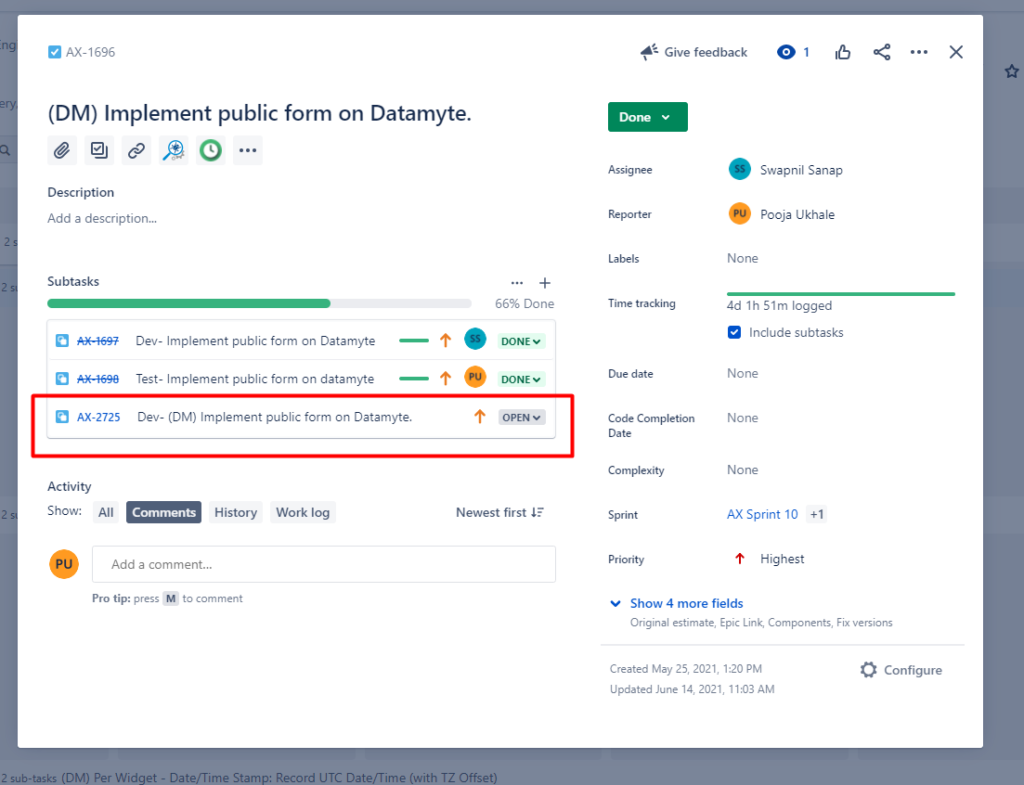
4. Change the state from Open to Todo
5. Select assignee from the list.
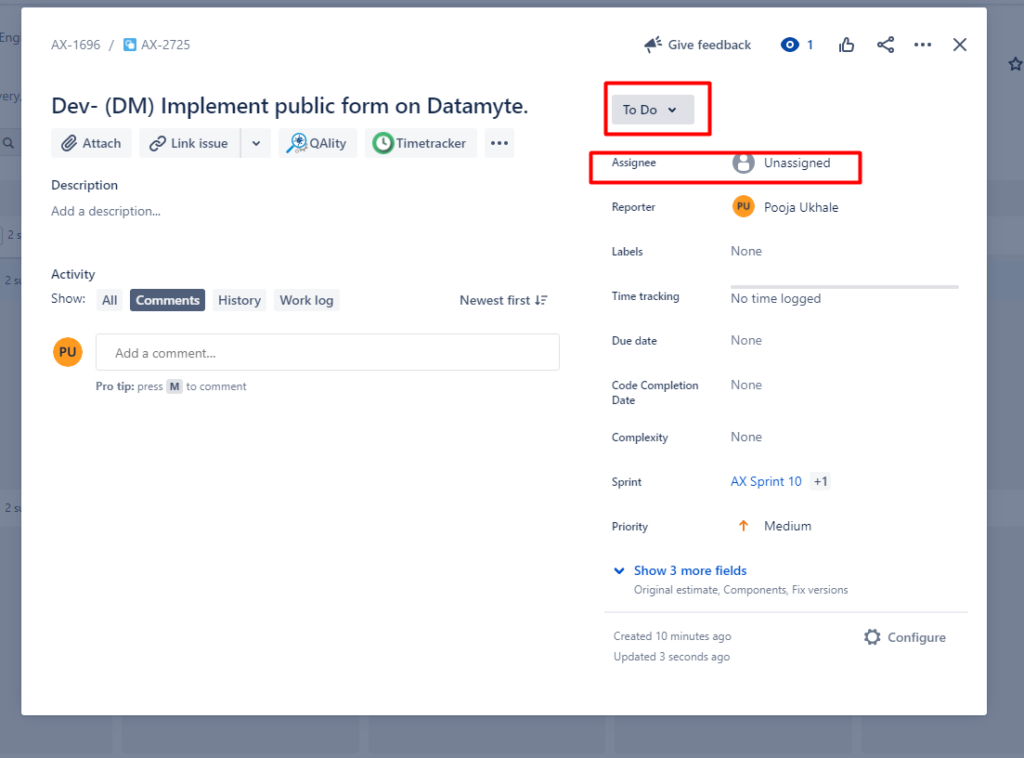
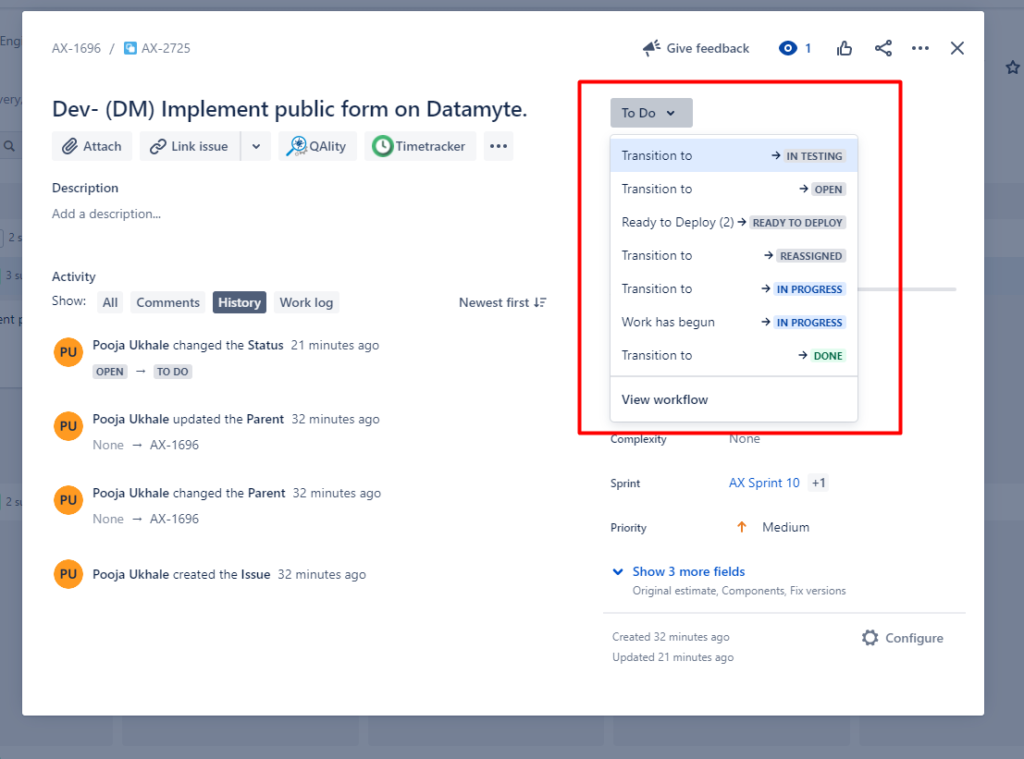
4. How to change the State?
Initially, the state for any ticket will be “Open”.
- Open the respective ticket from the task board.
2. Click on the To-Do dropdown, and select the status from the list.
- If you are working on the task/bug then change the state to “In progress“
- If you are done with working on task/bug but not yet deployed on the server then change the state to “Ready to deploy“.
- If the change is deployed on the server then change the state to “In Testing“.
- If the bug/task is not implemented completely or bug is not fixed then change the state to “Reassigned“.
- If you are done with the task then change the state to “Done“
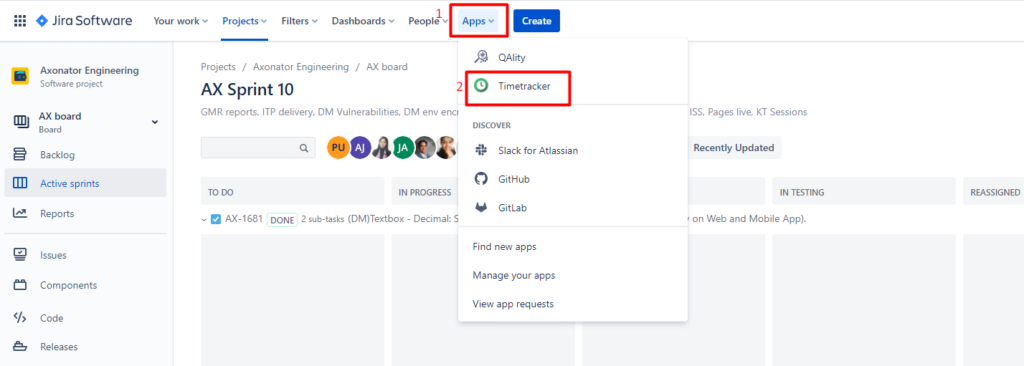
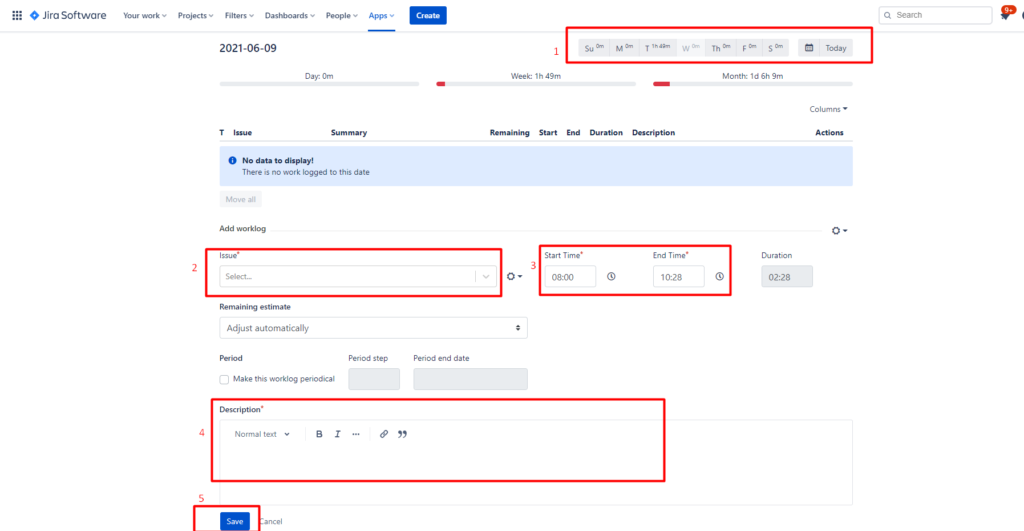
5. How to log the Time?
- Click on apps dropdown on the top.
- Select Timetracker from the list
3. Add the details as-
- Select the date
- Search and select the ticket in which you want to log the time in issue field
- Select the start and end time in start time and end time fields
- Add a thorough description like what you did exactly in that task in the description field.
- Click on the save button

0 Comments